
5 Productivity Tips in Visual Studio That You Should Know

If you’re like me, then you’re addicted to productivity tools. That’s one of the reasons why I love Visual Studio—it has an endless amount of productivity tricks. This post is going to show five such tricks that help in my work every day. Note that these are with Visual Studio only. There are extensions like ReSharper , Roslynator , and OzCode that add a ton of productivity value, but that’s for another blog post.
1. Snippets
Visual Studio allows you to quickly create common snippets of code. This might be a for loop, a try..catch clause or a using statement. To use it, just type the snippet’s shortcut. For a for statement, for example, start typing for.
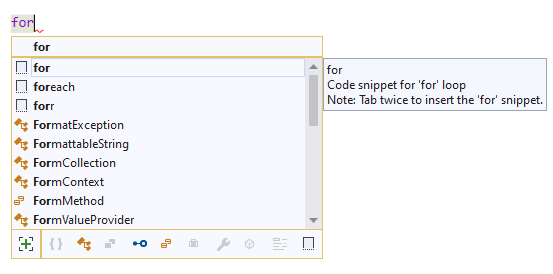
The IntelliSense shows there are three snippets that fit for (the first three items). To use one of them, simply hit Tab twice and VS will generate the boilerplate code.
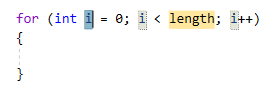
Now you can edit the highlighted pieces. Hit Tab to toggle between them and Enter or Esc when finished.
There are dozens of out-of-the-box snippets. Some of them are:
tryforeachif/elsedofor ado..whilelooppropdpfor a dependency property
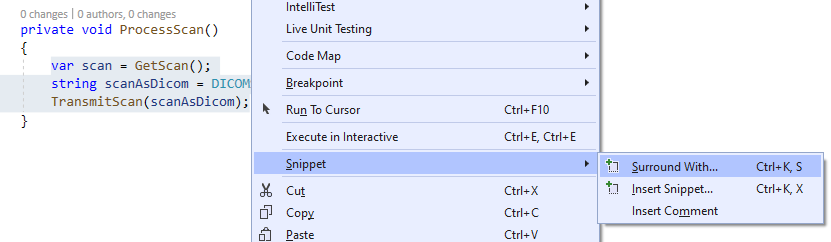
There are even snippets for blocks of code. For example, you can surround a block with a try..catch snippet.
2. IntelliSense Items from Unimported Namespaces
Have you ever felt that ReSharper’s IntelliSense is better than Visual Studio’s? That’s because ReSharper has been doing a lot of smart things VS hasn’t. Visual Studio is catching up though. A very recent addition is the add items from unimported namespaces option. It’s that “+” button in the corner.
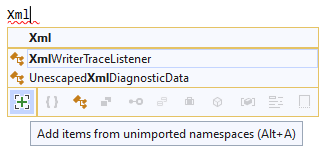
When you start writing something, Visual Studio shows auto-complete options just from the namespaces added (with using) in the current file. You can imagine it’s pretty limiting. What you really want is to see all the available options and to have the IDE import the correct namespaces. That’s exactly what this button does. When hit or when using the Alt + A shortcut, you’ll see items from all available namespaces of the project and even of its references:

3. Quick Actions and Refactorings
Visual Studio includes a lot of automatic refactoring and code generation abilities. Well, not as many as ReSharper
, but you’ll be surprised. Most of them can be access from the Quick Actions and Refactorings menu, which is accessible with the Ctrl + . shortcut. Just place the caret on something like a class and hit the shortcut. You’ll see a bunch of useful options:
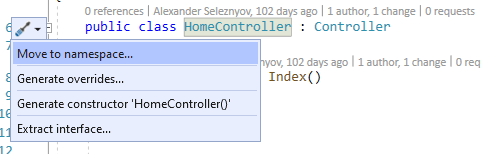
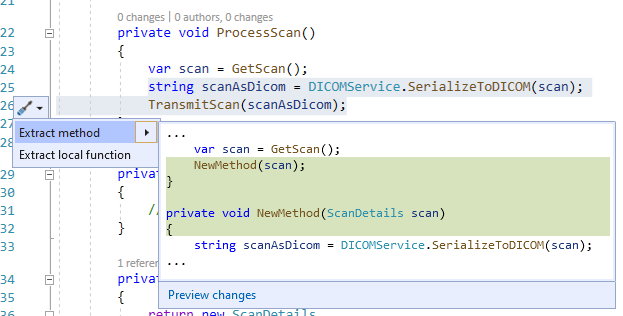
If you select a block of code, for example, you’ll usually be able to extract it to a method or a local function.
There are quite a lot of these. To discover them, whenever you’re standing over something, look for the Quick Action button:
![]()
If you’re using ReSharper, you might see a lightbulb button that shows ReSharper’s refactorings. Hitting that lightbulb will show actions from both ReSharper and Visual Studio in the same context menu.
4. To Track Active Item in Solution Explorer Or Not To Track
It can be pretty useful to go to the currently active file in the solution explorer. You might want to rename it, move it, see the file’s properties, or navigate to nearby files. Whatever it is, the last thing you want to do is to manually search for it in your solution’s item tree.
For years I’ve been using the Track Active Item option. When on, the solution explorer automatically changes the selected file to whatever file you’re currently editing.

This felt pretty productive, but the downside is that after working on a bunch of files, the solution explorer tree becomes a mess. Everything is expanded and it’s impossible to find anything. There’s also a small performance impact. So now I’ve changed strategy. Instead of automatically tracking the active item, I discovered that there’s a shortcut to navigate to that item on demand.
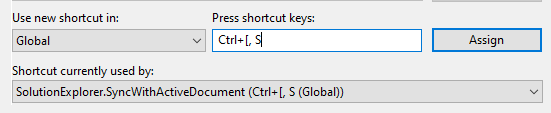
The default shortcut is Ctrl + [, S. I try to stay with the defaults. Not the easiest one to remember, but you get used to anything.
This means that my solution explorer now stays put. The expanded items stay expanded and nothing is scrolled without me doing the scrolling.
5. Ctrl + T tricks
There are a lot of ways to navigate in your solution. My favorite way is the Ctrl + T option (Edit | Go To | Go To All). You can search whatever you want and Visual Studio finds it. This might a file, a class, a property, a field, or a method.
This window has some tricks to it:
-
The regular search uses a simple “contains” logic. If a file/class/member contains the search input, you’ll see it in the search results.
-
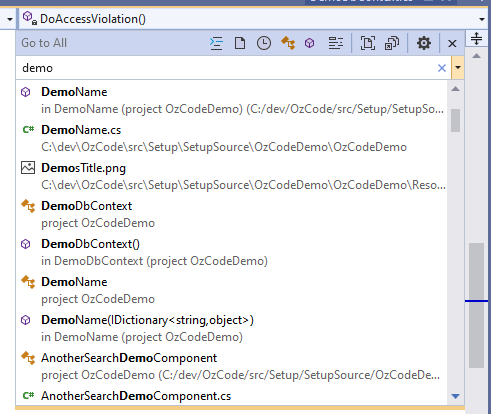
For items that are spelled with camelCase (or PascalCase), you can type just the initials. For example,
asdcwill findAnotherSearchDemoComponent: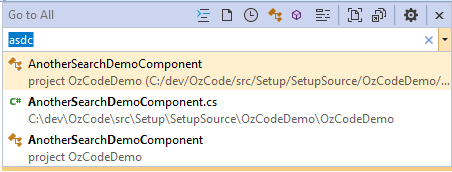
-
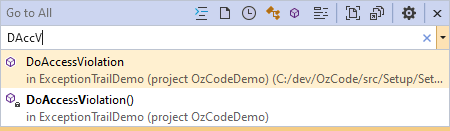
If you want to narrow the search further, you can combine the initials with part of the name.
-
You can narrow the search to specific item types:
f [search]looks for just filesr [search]looks in recent filest [search]looks in typesm [search]looks in members# [search]looks in symbols
Granted, Visual Studio has a couple of more things to learn from ReSharper, which also adds fuzzy search capabilities.
Summary
Visual Studio is a massive tool. You can use it every day for ten years, and still wouldn’t know every feature it has. I find out new things every day myself and I’ve written a book about it. If you’ve got cool features to share, please write in the comments below. Cheers.


