
Tutorial Table of Contents:
- Part 1: Introduction to VS extensibility
- Part 2: Add Menu Item
- Part 3: Add command to context menu and get selected code
- Part 4: Show a popup Window
- Part 5: Highlight code in Editor
- Part 6: Follow a span of code with TrackingSpan
- Part 8: Add UI in the indicator margin with Glyphs
During the tutorial we are going to build a VS extensions called CodyDocs and place it on GitHub . Each tutorial part is a standalone tutorial on a specific topic and can be viewed individually. CodyDocs will save code documentation in a separate file and the extension will allow to view and edit the documentation in the editor itself.
Part 7: Insert Button between text characters with Adornments
In this tutorial we’re going to start using Adornments. Adornments are graphics effects in the Editor that aren’t related to Font and color manipulation of the text itself. All Adornments are WPF elements.
When inserting WPF elements, we can insert them in between characters, expanding the text. Or we can insert Adornments in front, hiding the text.
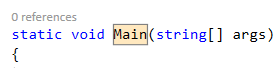
Here’s the end result of what we’re going to do:
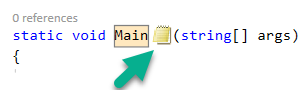
As you can see, there’s a WPF element (the yellow notepad) in between character, expanding the text.
How to add Adornment to the extension between text characters
There are two ways to add Adornments to the View. The first way uses IAdornmentLayer. We’re not going to cover this, since there’s a more robust way to do this, but here’s an example to give you an idea of how it works:
public TextAdornment1(IWpfTextView view)
{
    this.layer = view.GetAdornmentLayer("TextAdornment1");
    this.view.LayoutChanged += this.OnLayoutChanged;
}

internal void OnLayoutChanged(object sender, TextViewLayoutChangedEventArgs e)
{
    ...
    this.layer.AddAdornment(AdornmentPositioningBehavior.TextRelative,
        span, null, adornmentWPFElement, null);
}
An instance of this class is created for each document open in the editor. we listen to the LayoutChanged event and add an Adornment whenever the event fires. LayoutChanged happens when new lines are exposed to the screen. This usually happens after scrolling.
To create a template of this, go to Project -> Add New Item -> Extensibility -> Editor Text Adornment.
We are going to use a more robust method, using IntraTextAdornmentTag.
Create Adornments with IntraTextAdornmentTag
If you are new to Taggers, I suggest reading this tutorial first.
IntraTextAdornmentTag is a special Tag, built for Adornments that are inserted in between text characters. It accepts a WPF element in the constructor. When creating IntraTextAdornmentTags with ITagger, VS draws that WPF element in the editor.
To use IntraTextAdornmentTag, we will need to add 2 classes to out project :
IViewTaggerProvider – For each TextView, will create ITagger.
[Export(typeof(IViewTaggerProvider))]
[ContentType("code")]
[TagType(typeof(IntraTextAdornmentTag))]
internal class MyAdornmentTaggerProvider : IViewTaggerProvider
{
    public ITagger<T> CreateTagger<T>(ITextView textView, ITextBuffer buffer)
         where T : ITag
    {
         return new MyIntraTextAdornmentTagger(textView, buffer);
ITagger – This class implements GetTags method, which return a collection of our IntraTextAdornmentTags, and the Spans where they should be placed.
internal abstract class MyIntraTextAdornmentTagger : ITagger<IntraTextAdornmentTag>
{
    public IEnumerable<ITagSpan<IntraTextAdornmentTag>> GetTags(
        NormalizedSnapshotSpanCollection spans)
    {
       ...
    }

    public event EventHandler<SnapshotSpanEventArgs> TagsChanged;
}
The IViewTaggerProvider and ITagger classes are Exported with MEF and Visual Studio will know to:
1. Call CreateTagger whenever a new document (TextView) is opened in the Editor.
2. Call GetTags whenever a document is first opened, and whenever an update is needed (Maybe due to the user editing the code, or when scrolling).
So, for example, to draw a Yellow Notepad picture, like in the example, in row 20 and column 5, I’d do something like this:
<pre class="wrap:false lang:default decode:true">public virtual IEnumerable<ITagSpan<IntraTextAdornmentTag>> GetTags(NormalizedSnapshotSpanCollection spans)
{
    int row = 20, column = 5;
    int position = GetPosition(row, column);
    var tagSpan = new TagSpan<IntraTextAdornmentTag>(
        span: new SnapshotSpan(view.TextBuffer.CurrentSnapshot, new Span(position, 0)),
        tag: new IntraTextAdornmentTag(new YellowNotepadAdornment(), null, PositionAffinity.Predecessor));
    return new List<ITagSpan<IntraTextAdornmentTag>>() { tagSpan };
}
- Position is represented in “Stream” position, which means the character number from the start of the document.
- “view” is of type IWpfTextView and should be saved as a member in the constructor. ITextView can be casted to IWpfTextView.
- YellowNotepadAdornment is a regular WPF element.
- PositionAffinity.Predecessor means the WPF element will be drawn before the character in ‘position’.
- Span is of length 0, so that the Adornment won’t take any character space, and won’t hide any code. Instead, it will expand the space between characters.
Use Microsoft’s Tagger base class
Creating adornments, which are WPF elements, is expensive and can cause performance issues when combined with editor text changes (user editing the code). In Microsoft’s sample on Intra-Text-Adornment , you can see a base class for all adornment taggers. You can overcome the performance issues by deriving from this class.
The base Tagger does two things:
- It draws the adornments with a delay and asynchronously.
- It caches the adornments.
Deriving from this class is the recommended way and we’ll co that in the following example
Implementing Intra Text Adornments in CodyDocs
In the previous tutorials, we created an extension called CodyDocs. CodyDocs allows the user to select text and add documentation (comments). The documentation is saved in a separate file (.cs.cdocs). The extension highlights documented text, to indicate which parts have documentation.
In this tutorial, we’ll also add a button in the end of each documented text. The purpose is for the user to hover over the button and see the documentation. On click, a popup will open to edit or remove the documentation.
Adding the code
We’re going to use IntraTextAdornments, with the yellow-notepad picture. We will need to add several classes to the code.
The Adornment (yellow-notepad) WPF element
<UserControl x:Class="CodyDocs.EditorUI.DocumentedCodeEditIntraTextAdornment.YellowNotepadAdornment"
             xmlns="http://schemas.microsoft.com/winfx/2006/xaml/presentation"
             >
    <Image Source="../../Resources/yellow_notepad.png" Margin="3 0 1 0"/>
</UserControl>
This is a regular WPF UserControl, with an image.
Unlike a regular WPF project, in a VSIX extension, it was difficult to add an image resource. The only way I was able to do that is to mark the file as a Resource, and use a Relative Path in Source property.
IViewTaggerProvider
<pre class="wrap:false lang:default decode:true">[Export(typeof(IViewTaggerProvider))]
[ContentType("code")]
[TagType(typeof(IntraTextAdornmentTag))]
internal sealed class EditDocumentationAdornmentTaggerProvider : IViewTaggerProvider
{

#pragma warning disable 649 // "field never assigned to" -- field is set by MEF.
    [Import]
    internal IViewTagAggregatorFactoryService ViewTagAggregatorFactoryService;
#pragma warning restore 649

    public ITagger<T> CreateTagger<T>(ITextView textView, ITextBuffer buffer)
       where T : ITag
    {
        if (textView == null)
            throw new ArgumentNullException("textView");
        if (buffer == null)
            throw new ArgumentNullException("buffer");
        if (buffer != textView.TextBuffer)
            return null;

        ITagAggregator< DocumentedCodeHighlighterTag> tagAggregator =
            ViewTagAggregatorFactoryService.CreateTagAggregator<DocumentedCodeHighlighterTag>(textView);

        return new EditDocumentationAdornmentTagger((IWpfTextView)textView, tagAggregator)
            as ITagger<T>;
    }
}
We are creating an ITagger for each open document in the editor (aka Text View).
We import ViewTagAggregatorFactoryService, which is a factory to create TagAggregator.
TagAggregator
Tag Aggregator provides functionality to get all exported Tags of type T. So, if we are implementing ITagger in some class and want to use the created Tags in another class, we can do that with Tag Aggregator.
In our case, we already create Tags to highlight the text (DocumentedCodeHighlighterTag). The IntraTextAdornment Tags, which we need to create, are directly dependent on the highlight tags. So instead of duplicating the same functionality to create our tags in the same place, we can use TagAggregator to find the highlight tags.
ITagger
class AdditionalData
{
}

internal sealed class EditDocumentationAdornmentTagger : IntraTextAdornmentTagger<AdditionalData, YellowNotepadAdornment>
{
    private ITagAggregator<DocumentedCodeHighlighterTag> _tagAggregator;
    private ITextBuffer _buffer;
    private string _codyDocsFilename;

    public EditDocumentationAdornmentTagger(IWpfTextView view, ITagAggregator<DocumentedCodeHighlighterTag> tagAggregator)
        : base(view)
    {
        this._tagAggregator = tagAggregator;
        _tagAggregator.TagsChanged += OnTagsChanged;
        _buffer = view.TextBuffer;
        _codyDocsFilename = view.TextBuffer.GetCodyDocsFileName();

    }

    private void OnTagsChanged(object sender, TagsChangedEventArgs e)
    {
        var snapshotSpan = e.Span.GetSnapshotSpan();//Extension method
        InvokeTagsChanged(sender, new SnapshotSpanEventArgs(snapshotSpan));

    }

    public void Dispose()
    {
        _tagAggregator.Dispose();
    }

    // To produce adornments that don't obscure the text, the adornment tags
    // should have zero length spans. Overriding this method allows control
    // over the tag spans.
    protected override IEnumerable<Tuple<SnapshotSpan, PositionAffinity?, AdditionalData>> GetAdornmentData(NormalizedSnapshotSpanCollection spans)
    {
        if (spans.Count == 0)
            yield break;

        ITextSnapshot snapshot = spans[0].Snapshot;

        var commentTags = _tagAggregator.GetTags(spans);
        foreach (IMappingTagSpan<DocumentedCodeHighlighterTag> commentTag
            in commentTags)
        {
            NormalizedSnapshotSpanCollection colorTagSpans =
              commentTag.Span.GetSpans(snapshot);

            // Ignore data tags that are split by projection.
            // This is theoretically possible but unlikely in current scenarios.
            if (colorTagSpans.Count != 1)
                continue;
            if (commentTag.Span.GetSpan().Length == 0)
                continue;

            SnapshotSpan adornmentSpan = new SnapshotSpan(colorTagSpans[0].End, 0);

            yield return Tuple.Create(adornmentSpan,
                  (PositionAffinity?)PositionAffinity.Successor, new AdditionalData());
        }
    }

    protected override YellowNotepadAdornment CreateAdornment(AdditionalData additionalData, SnapshotSpan span)
    {
        return new YellowNotepadAdornment();
    }

    protected override bool UpdateAdornment(YellowNotepadAdornment adornment, AdditionalData additionalData)
    {
        //adornment.Update(additionalData);
        return false;
    }
}
We are deriving from Microsoft’s IntraTextAdornmentTagger base class for the performance issues.
Here, we create the Adornments for each open Text View. Well, actually we create Tags that implement IntraTextAdornmentTag, and Visual Studio takes care to create an Adornment for each created Tag. In our case, the Adornment is a yellow notepad image.
Let’s examine this class:
- We are using Tag Aggregator to collect the highlight Tags (DocumentedCodeHighlighterTag). For each highlight Tag, we are creating our own Tag starting with the end of the highlight Tag span and with length 0. Length 0 is important for the Adornment to take no space and not to hide code.
- TagsChanged event in Tag Aggregator indicates that the highlight tags might have been changed and we call our own TagsChanged with InvokeTagsChanged
protected void InvokeTagsChanged(object sender, SnapshotSpanEventArgs args)
{
    TagsChanged?.Invoke(sender, args);
}
- Note the AdditionalData empty class. This is a way to pass data from GetAdornmentData to CreateAdornment and UpdateAdornment.
In our case, the Adornment is also the same – a yellow notepad, so there’s no additional data to pass.
In other scenarios, if using ITagAggregator<T>, you can pass the original tag T, which might hold data that affects the desired Adornment. - CreateAdornment creates the Adornment WPF element.
- UpdateAdornment is an optimization. When Tags changed, this is called with new “additional data”. Here the Adornment should be modified with whatever changes in “additional data”. If UpdateAdornment returns true, then the Adornment will be removed from cache and re-created. In our case, the yellow notepad never changes.
- GetSnapshotSpan mapping method is needed because The TagsChanged parameters in ITagAggregator are a bit different than the ones in ITagger:```
public static SnapshotSpan GetSnapshotSpan(this IMappingSpan mappingTagSpan)
  {
      var buffer = mappingTagSpan.AnchorBuffer;
      var span = GetSpan(mappingTagSpan);
      var snapshot = mappingTagSpan.Start.GetPoint(buffer, positionAffinity).Value.Snapshot;
      return new SnapshotSpan(snapshot, span);
  }
  ```
That’s it, our yellow notepad adornment should now work.
The Result
I added some more functionality:
- Hover over the Adornment will show the documentation text in a popup.
- Clicking on the Adornment will open a window to edit or delete the documentation.
Here’s the result:
Summary
We saw how to add any UI element to the editor, in between character with Adornment. To do that, we used a special Tag IntraTextAdornmentTag.
To see how to make the Adornment replace text, you can look into this sample .
There are more ways to use Adornments. We can place adornments in a fixed position in the editor, or even expand lines and place them above or below code (This is more difficult), and we’ll probably cover that in a later tutorial.
The code is available on GitHub . To checkout to the extension code right after this tutorial part, use the Tag Part7:
git clone https://github.com/michaelscodingspot/CodyDocs.git
git checkout tags/Part7
Hope you learned something from this, happy coding.


