
Tutorial Table of Contents:
- Part 1: Introduction to VS extensibility
- Part 2: Add Menu Item
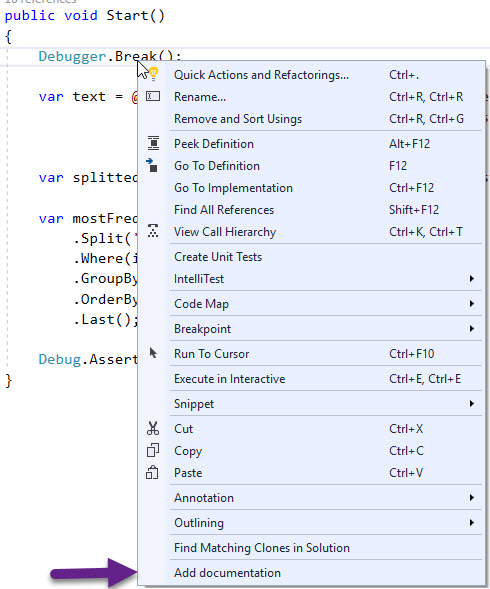
- Part 3: Add command to context menu and get selected code
- Part 5: Highlight code in Editor
- part 6: Follow a span of code with TrackingSpan
- Part 7: Insert buttons between text characters with Adornments
- Part 8: Add UI in the indicator margin with Glyphs
During the tutorial we are going to build a VS extensions called CodyDocs and place it on GitHub . Each tutorial part is a standalone tutorial on a specific topic and can be viewed individually. CodyDocs will save code documentation in a separate file and the extension will allow to view and edit the documentation in the editor itself.
Part 4: Show a popup Window
In the previous part we created a Command that appears in the code editor’s context menu.
Let’s place our logic to run on our command’s callback:
private void MenuItemCallback(object sender, EventArgs e)
{
    TextViewSelection selection = GetSelection(ServiceProvider);
    string activeDocumentPath = GetActiveDocumentFilePath(ServiceProvider);
    ShowAddDocumentationWindow(activeDocumentPath, selection);
}
ShowAddDocumentationWindow is the only line relevant to this part of the tutorial.
To show our own custom popup window, Microsoft recommends using DialogWindow , which is what we will do. This is a WPF window which allows you to act as a modal dialog. Which means the popup blocks the rest of Visual Studio UI until closed.
First, to use WPF we will need these references:
- PresentationCore
- PresentationFramework
- WindowsBase
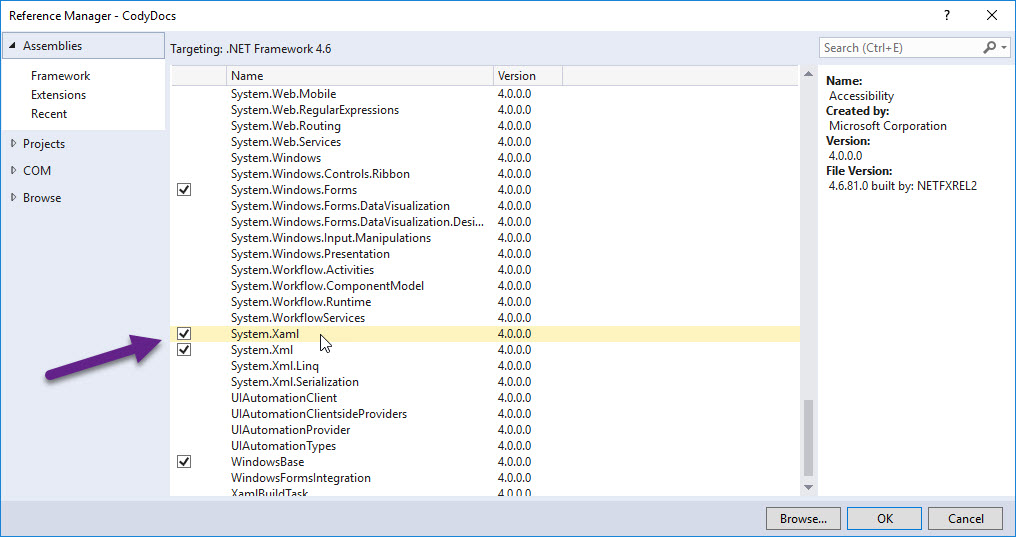
- System.Xaml
System.Xaml is probably the only thing missing from the regular VSIX template project. To add it, right click on the project -> Add -> Reference and choose System.Xaml.
Create a DialogWindow
For some reason, we can’t add a new DialogWindow item to our project directly. It doesn’t exist in the New Item dialog. There’s an easy way to get over this obstacle though.
First, we need to create a BaseDialogWindow class we can use for all our popup windows:
public class BaseDialogWindow : DialogWindow
{

    public BaseDialogWindow()
    {
        this.HasMaximizeButton = true;
        this.HasMinimizeButton = true;
    }
}
Now we need to create our custom window with XAML and code behind that we can edit. There’s a little trick we need to use so we can have our .xaml file next to our .xaml.cs file. First, add a new UserControl item to the project. Let’s call it AddDocumentationWindow. We’re calling it a Window because it will become that real soon.
The user control initially looks like this:
<UserControl x:Class="CodyDocs.AddDocumentationWindow"
             xmlns="http://schemas.microsoft.com/winfx/2006/xaml/presentation"
             ...>
    <TextBlock Text="Hello World!/>
</UserControl>
In .xaml.cs:
public partial class AddDocumentationWindow: UserControl
{
    public AddDocumentationWindow()
    {
        InitializeComponent();
    }
}
Now let’s change it to a Window. It should inherit BaseDialogWindow, so in .xaml, UserControl should change to BaseDialogWindow:
<local:BaseDialogWindow x:Class="CodyDocs.AddDocumentationWindow"
             xmlns="http://schemas.microsoft.com/winfx/2006/xaml/presentation"
             ...>
    <TextBlock Text="Hello World!/>
</UserControl>
The .xaml.cs file remains unchanged.
That’s it. Now you can edit the XAML and code behind as needed.
Show the popup Dialog Window
To show the dialog, create an instance of the Dialog Window and call ShowDialog:
private void ShowAddDocumentationWindow()
{
    var documentationControl = new AddDocumentationWindow();
    documentationControl.ShowDialog();
}
Popup window in CodyDocs
As mentioned before, we’re building an extension called CodyDocs as part of this tutorial. I added code that shows a popup window from our context menu command “Add documentation”. Here’s how it looks:
The code is available on [GitHub](https://github.com/michaelscodingspot/CodyDocs). To checkout to the extension code right after adding the popup window, use the Tag **Part4**:<pre class="theme:powershell lang:default decode:true">> git clone https://github.com/michaelscodingspot/CodyDocs.git
> git checkout tags/Part4
Summary
In this part, we saw how to show a popup dialog window with a Visual Studio extension. I’ll admit it’s not the most intuitive thing in the world, but not too hard either.
In following tutorial parts, we’ll see how to show adorners (heads up display) in the code editor. A bit further on, I also plan to get into Roslyn, the C# compiler that allows us to analyze and rewrite code.


